Little Sewing Machine, a game developer active since before 2025, surprisingly connects to the world of compact sewing!
Understanding your sew manual is crucial; it’s a guide to mastering these portable machines, offering essential safety instructions and operational guidance.
Many find their sewing manual invaluable, knowing it intimately after repeated readings, while beginners benefit from tutorials demonstrating basic operations.
What is Little Sewing Machine?
Little Sewing Machine is, unexpectedly, a video game developer. Emerging before 2025, the company gained initial recognition through its game, Bye Sweet Carole. While seemingly unrelated to the miniature sewing machines we discuss, the name creates a curious intersection.
The developer’s presence in the gaming world doesn’t diminish the importance of understanding the practical “little sewing machine” – the portable, often LED-equipped devices gaining popularity. These machines, like the InnovaGoods V0103326 model, require careful operation, and a sew manual is paramount.
The connection is purely nominal, yet it highlights how a brand name can exist across diverse industries. Focusing on the sewing aspect, these machines offer accessible sewing solutions, and mastering them begins with diligent manual review.
The Importance of a Sewing Machine Manual
A sewing machine manual isn’t merely an accessory; it’s a critical component for safe and effective operation, especially with mini machines. Before use, carefully reading the manual is essential, particularly the safety instructions, to prevent damage or injury. Ignoring these guidelines can lead to operational issues.
For beginners, tutorials and the manual work hand-in-hand, providing a foundation for understanding basic operations like threading and bobbin winding. Even experienced sewers benefit from referencing the manual for specific machine features.
Models like the InnovaGoods V0103326 emphasize the need for documentation. A manual ensures you maximize your machine’s potential and troubleshoot common problems effectively, extending its lifespan.
Understanding Your Mini Sewing Machine
Mini sewing machines, like those from InnovaGoods, require familiarization with components. Operating without a foot pedal is possible, lifting the needle is key, and understanding parts is vital.
Key Components of a Typical Mini Sewing Machine
Understanding the parts of your mini sewing machine is essential for successful operation. Key components include the hand wheel (K), used to raise and lower the needle (R), and the presser foot (F), which holds fabric in place during stitching.
The machine also features a bobbin, responsible for the lower thread, and mechanisms for adjusting stitch length and width. Many models, like the Easy Home MS-201, have straightforward controls, but consulting your sew manual is always recommended.
Familiarize yourself with the threading path, needle clamp, and tension controls. Even though some machines are described as having “little” instructions, a manual provides clarity. Knowing these elements ensures smooth sewing and prevents common issues like jamming or broken threads.
Safety Precautions Before You Begin
Prioritizing safety is paramount when operating any sewing machine, even a mini model. Always read the user manual carefully, paying particular attention to safety instructions – failure to do so can lead to accidents.
Before plugging in or turning on the machine, ensure the power switch is off. Keep fingers away from the needle while sewing; use the hand wheel to carefully position the fabric. Never force the fabric under the needle.
Disconnect the machine from the power source when changing the needle or performing maintenance. Be mindful of moving parts and avoid loose clothing or jewelry that could get caught. A little caution prevents significant issues!
Getting Started: Basic Operations
Beginner-friendly tutorials demonstrate essential steps for operating mini sewing machines, focusing on threading, bobbin winding, and stitch adjustments – key skills for successful sewing!
Threading the Needle: A Step-by-Step Guide
Successfully threading a mini sewing machine is fundamental. First, ensure the machine is off and the presser foot is raised. Lift the needle to its highest position by turning the hand wheel clockwise – a crucial initial step.
Next, guide the thread through the various threading guides, following the numbered sequence detailed in your sew manual. This typically involves passing the thread through tension discs and then down to the needle.
Finally, carefully insert the thread through the eye of the needle. A needle threader can be incredibly helpful for this! Gently pull a length of thread through, approximately 3-4 inches, to begin sewing. Always refer to your specific machine’s manual for precise instructions, as threading paths can vary.
Winding the Bobbin
Winding the bobbin correctly is essential for smooth sewing. Begin by placing the bobbin on the bobbin winder spindle. Secure the thread end through the tension disc or guide, as illustrated in your sew manual.
Engage the bobbin winder by pushing it to the right. Simultaneously, hold the thread tail firmly as you start the machine slowly, allowing the bobbin to begin winding evenly.
Monitor the winding process, ensuring the thread doesn’t overlap or become uneven. Once the bobbin is full, the winder will automatically stop. Cut the thread and remove the bobbin. Proper winding prevents issues like uneven stitching and thread breakage.
Adjusting Stitch Length and Width
Adjusting stitch length and width allows for versatile sewing. Your sew manual will detail the specific dials or settings for your mini machine. Typically, a smaller stitch length is ideal for delicate fabrics, providing a stronger, more secure seam.
Conversely, a longer stitch length suits thicker materials or when creating gathers. Stitch width controls the zigzag pattern’s breadth; a narrower width creates a straight stitch, while wider settings are perfect for finishing raw edges or decorative stitching.
Experiment with different settings on scrap fabric to understand how they affect the final result. Precise adjustments ensure optimal stitch quality and fabric compatibility.

Advanced Techniques
Advanced techniques build upon basics, enabling curved and corner sewing, and adapting to diverse fabrics. Mastering these skills, guided by your sew manual, unlocks creative potential!
Sewing Straight Lines
Achieving consistently straight lines is fundamental to successful sewing, even with a mini machine. Begin by gently guiding the fabric, not pulling it, allowing the machine to feed the material evenly. Utilize the edge of the presser foot as a visual guide, keeping the fabric aligned with a marked line or edge.
Refer to your sew manual for specific guidance on adjusting stitch length – a shorter stitch generally provides more control for straight lines. Practice on scrap fabric first! Maintaining a consistent seam allowance is also key; many machines have markings to assist with this. Remember to lift the presser foot periodically to reposition the fabric smoothly, preventing puckering or uneven stitches.
Slow and steady wins the race; avoid rushing, and focus on maintaining a consistent speed and gentle guidance.
Sewing Curves and Corners
Navigating curves and corners with a mini sewing machine requires a slightly different technique than straight stitching. Slow down considerably! For gentle curves, slightly ease the fabric around the needle, pivoting as needed. Avoid sharply turning the fabric, which can cause bunching or skipped stitches.
When approaching corners, stop with the needle down in the fabric. Lift the presser foot, pivot the fabric to the new direction, and lower the presser foot again before continuing. Your sew manual may suggest using a shorter stitch length for increased control around curves and corners.
Practice on scraps to develop a feel for the machine’s responsiveness. Consistent speed and gentle guidance are crucial for smooth results.
Dealing with Different Fabric Types
Your sew manual likely emphasizes adjusting settings based on fabric weight. Lightweight fabrics, like silk or chiffon, require a finer needle, lighter thread, and a shorter stitch length to prevent puckering. Conversely, heavier materials – denim or canvas – demand a robust needle, heavier thread, and a longer stitch length for penetration and durability.
Always test on fabric scraps first! Some mini machines struggle with very thick fabrics. Consider hand-cranking for greater control when sewing challenging materials. Avoid stretching delicate fabrics; use a walking foot if available.
Refer to your manual for specific needle and thread recommendations for various fabric types. Proper setup is key to achieving professional-looking results.

Troubleshooting Common Issues
Sew manual guidance is vital when problems arise! Common issues include jamming, broken thread, and uneven stitching. Always consult your manual before attempting repairs or adjustments.
Machine is Jamming
Dealing with a jammed mini sewing machine can be frustrating, but your sew manual offers solutions! First, always turn off and unplug the machine before attempting to clear a jam. Carefully lift the needle to its highest position using the hand wheel.
Inspect the area around the needle plate and bobbin case for tangled threads or fabric pieces. Gently remove any obstructions – avoid pulling forcefully, as this could damage the machine. Refer to your sew manual’s diagrams for proper bobbin removal and re-insertion.
Ensure the presser foot is raised, allowing for easier fabric movement. Re-thread the machine, following the manual’s threading guide precisely. Sometimes, incorrect threading is the root cause of jamming. Finally, test with a scrap fabric to confirm the issue is resolved.
Thread Keeps Breaking
Frequent thread breakage with your mini sewing machine is a common issue, and your sew manual likely addresses it. Begin by ensuring you’re using the correct type and size of thread for your fabric. A mismatch can cause excessive friction and breakage.
Check the threading path meticulously, following the diagrams in your sew manual. Incorrect threading is a primary culprit. Ensure the thread is smoothly flowing through all guides and tension discs. Inspect the needle for any burrs or damage; a dull or bent needle will fray and break thread.
Adjust the thread tension – too tight or too loose can lead to breakage. Finally, confirm the bobbin is wound evenly and correctly inserted. A poorly wound bobbin creates uneven tension.
Uneven Stitching

Uneven stitches are frustrating, but often easily corrected with reference to your sew manual. First, re-thread both the upper thread and the bobbin, ensuring proper seating in all guides. Incorrect threading is a frequent cause of inconsistent stitch length.
Verify the presser foot is correctly installed and applying even pressure to the fabric. An improperly seated foot can cause skipped stitches or uneven tension. Adjust the stitch length according to your fabric type, as detailed in the sew manual.
Check the needle; a bent or dull needle will produce poor stitch quality. Finally, ensure the fabric is being fed smoothly – avoid pulling or pushing it.
Maintaining Your Sewing Machine
Regular maintenance, guided by your sew manual, extends your machine’s life. Cleaning, oiling, and needle replacement are key; proper storage protects it from damage.
Cleaning and Oiling
Consistent cleaning is vital for a smoothly functioning mini sewing machine. Dust and lint accumulate, hindering performance, so regularly remove debris with a small brush – often included with the machine, or a soft toothbrush works well; Refer to your sew manual for specific cleaning recommendations, as some parts may require more delicate attention.
Oiling ensures moving parts operate efficiently. Apply a drop of sewing machine oil to key areas like the bobbin case, hook, and any points indicated in your manual. Avoid over-oiling, as excess oil attracts dust. A little goes a long way! Always unplug the machine before cleaning or oiling for safety. Following these steps, detailed in your sew manual, will keep your Little Sewing Machine in optimal condition.
Replacing the Needle
A dull or bent needle can cause skipped stitches, thread breakage, and even damage your fabric. Regularly inspect your needle and replace it when necessary – your sew manual will detail the correct needle type for your machine and fabric. Always unplug the machine before changing the needle!
To replace the needle, loosen the needle clamp screw, remove the old needle, and insert the new one with the flat side facing the back. Ensure it’s pushed up firmly and tighten the screw securely. Consult your sew manual for a visual guide if needed. Using the correct needle and proper installation, as outlined in your manual, ensures optimal sewing performance and prevents potential issues.
Storage and Care
Proper storage and care extend the life of your mini sewing machine. Always store it in a clean, dry place, ideally covered to protect it from dust. Refer to your sew manual for specific recommendations, but generally, avoid storing it in extreme temperatures or humidity.
Regular cleaning and oiling (detailed in the manual) are vital. Before storing, ensure the machine is thoroughly cleaned of lint and debris. A drop of sewing machine oil on key moving parts keeps everything running smoothly. Your sew manual is your best resource for maintaining peak performance and preventing issues, ensuring your little machine remains a reliable companion for years to come.
Exploring the “Bye Sweet Carole” Connection
Little Sewing Machine, the game developer behind “Bye Sweet Carole,” presents an unexpected link to these compact sewing devices! The brand’s origin is in game development.
Little Sewing Machine’s Game Development
Little Sewing Machine emerged as a video game developer, actively creating and publishing titles before 2025. Their initial and notable project was the game “Bye Sweet Carole,” indicating a foundation in interactive entertainment. While seemingly distant from the realm of miniature sewing machines, the company’s name creates a curious juxtaposition.
The connection highlights an interesting branding choice, potentially leveraging the familiarity and charm associated with traditional sewing to create a memorable identity. It’s a unique approach, blending the digital world of gaming with the tactile craft of sewing. Further investigation into the company’s history might reveal the reasoning behind this distinctive name and its potential marketing implications;
Their focus remains on game development, but the name sparks intrigue.
Relevance to the Sewing Machine Brand
The connection between Little Sewing Machine, the game developer, and the actual mini sewing machines – like the InnovaGoods V0103326 – is primarily a naming coincidence, yet a clever one. The brand name evokes a sense of small-scale precision and domesticity, qualities often associated with both gaming and sewing.
This association might subtly influence consumer perception, suggesting reliability and user-friendliness. The sewing machines themselves, often marketed towards beginners, align with the idea of accessible, “little” projects. The availability of user manuals, crucial for operation, reinforces the need for clear instructions, mirroring the guided experience of a video game.
Ultimately, it’s a memorable branding synergy, even if unintentional.
Resources and Further Learning
Online tutorials and videos, like those demonstrating mini sewing machine operation, are readily available. User manuals (e.g., InnovaGoods V0103326) provide detailed guidance for your sew manual.
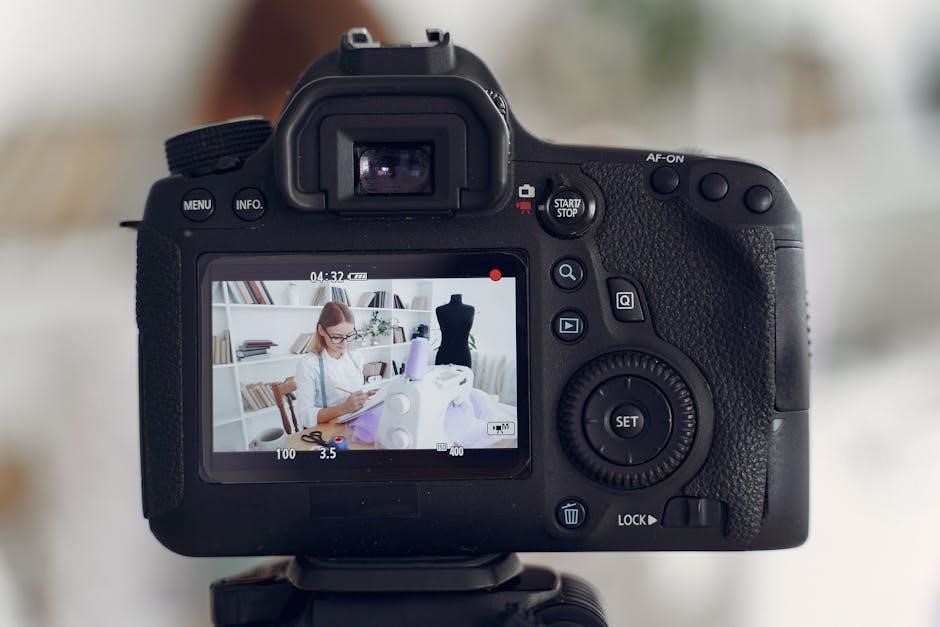
Online Tutorials and Videos
Numerous online resources cater to beginners navigating mini sewing machines. A helpful tutorial, available on YouTube, demonstrates how to operate these compact devices, offering essential tips for those new to portable sewing. These videos often cover threading, bobbin winding, and basic stitch adjustments, providing a visual learning experience.
Searching platforms like YouTube with keywords like “mini sewing machine tutorial” or “portable sewing machine guide” yields a wealth of instructional content. Many creators showcase practical demonstrations, troubleshooting common issues, and even advanced techniques. These resources complement your sew manual, offering alternative explanations and visual aids to enhance understanding. Don’t hesitate to explore these readily accessible learning tools!
User Manuals and Documentation (InnovaGoods V0103326 Example)
Accessing the official user manual is paramount for optimal machine operation. The InnovaGoods V0103326 LED Mini Sewing Machine, for instance, has a downloadable PDF manual providing detailed instructions. These manuals typically begin with crucial safety precautions, emphasizing the importance of careful reading before use. They outline each component, explain threading procedures, and detail stitch adjustment methods.
Understanding the manual’s diagrams and explanations ensures correct operation and prevents damage. While online tutorials are helpful, the sew manual serves as the definitive guide for your specific model. Be aware that some manuals may initially appear in languages other than English, but translation options are often available. Always refer to the official documentation for accurate information.